As much as we’d all love to keep cruising all year, most of us eventually hit that point where the water turns slushy and the stoke has to wait for spring. If you’re getting ready to put your Waydoo away for a few months, a little prep work now will save you frustration, battery damage, and unnecessary service tickets down the road.
This quick guide walks you through how we store our shop gear once the chill sets in, and what we recommend for every rider heading into winter.
Start With the Battery
Your battery is the one component that absolutely can’t be ignored, because long-term storage at the wrong charge level or in the wrong environment will shorten its lifespan.
You target charge for storage should be 50-60%. Storing at full capacity for months stresses the cells and slowly cuts into lifespan. If it sits empty, you risk over-discharging.
How to Get Your Battery to 50%
There are two options to drain your Waydoo battery:
Option 1: Go ride.
Honestly, this is the easiest method. Take one more fall session, run the pack down to about half, pull the gear apart, let everything dry, and call it good. If your water looks like ours right now and that sounds miserable, route two might make more sense.
Option 2: Use the EVO invertible charger as a power bank.
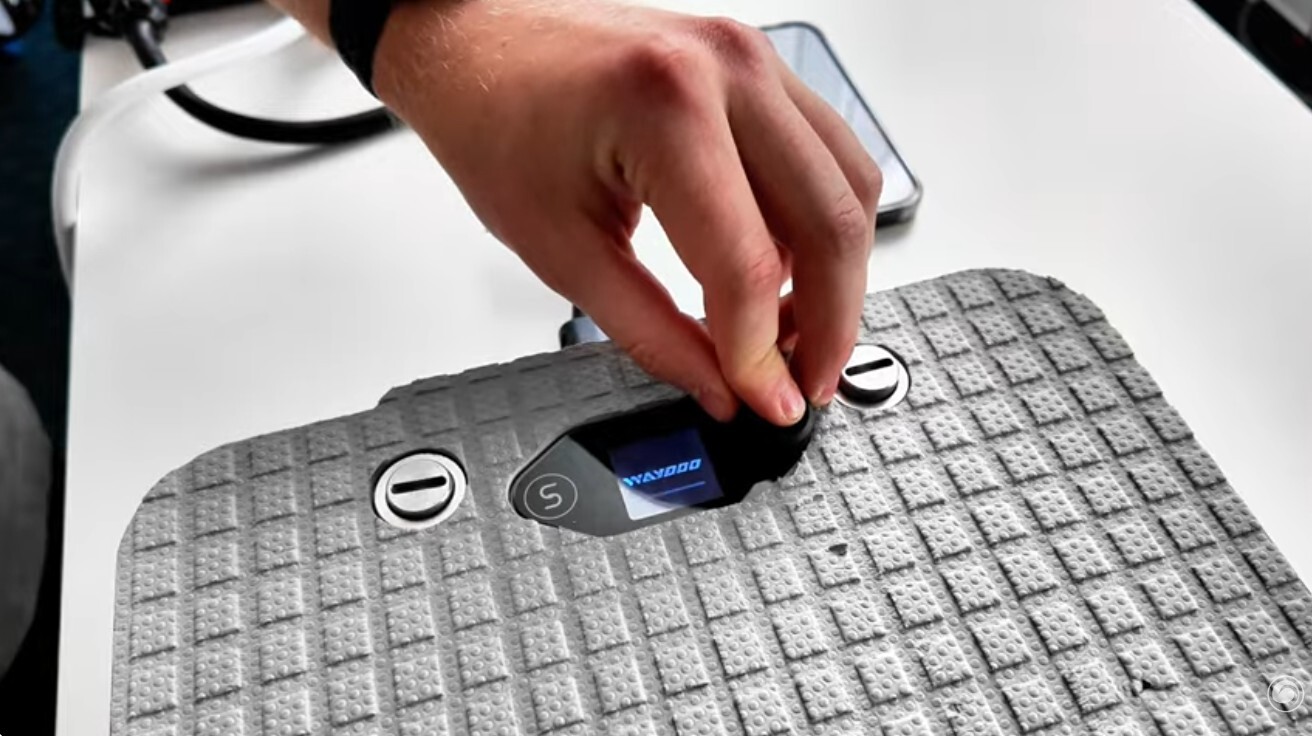
For Waydoo riders with the two-hour fast charger, you can flip it into “invertible” mode and let the battery power small electronics. Turn the battery on, switch the cord to Reset, hold the breathing button on the connector to activate it, and plug in a phone or laptop. It won’t drain instantly, but it beats freezing your fingertips off for a 20-minute session.
While we don't have a precise minute-by-minute discharge rate for you, we know it’s a nice slow draw that’ll get the pack down safely over an afternoon.
Clean the Electronics
Your connectors, terminals, and gaskets deserve a little attention before months of downtime. After your last ride:
Let everything air dry naturally.
Use rubbing alcohol and Q-tips to clean any old grease or moisture from the terminals.
Re-grease only the rubber gaskets, not the actual metal connector pins. A little goes a long way. Grease inside the pins can interfere with data flow, which leads to goofy error messages and unnecessary troubleshooting in spring.
If you’ve ever had your Waydoo refuse to boot after winter, nine times out of ten it comes back to moisture or old grease in the wrong spot. A five-minute cleaning now avoids that headache.
Choose the Right Storage Location
Cold kills batteries slowly, so avoid the uninsulated garage even if that’s where the rest of your gear lives.
Ideal battery storage spots:
A closet inside the house
A basement that stays dry
Any indoor space that avoids freezing temps
Not ideal:
Detached garages
Vehicles
Sheds
Anywhere that swings between freezing and warm throughout the wing
Every other component — mast, board, wings, remote — can hang out in the basement, garage, or gear room without issue. For remotes, it’s still nice to let them settle around 50 percent charge.
A Quick Recap — Your Waydoo Winter Prep Checklist
Bring battery to 50–60 percent
Clean and dry all connectors
Grease only the gaskets
Store the battery indoors away from cold
Stash the rest of the kit wherever it fits
Reach out if you’re unsure about anything
If you’ve got questions, want a quick FaceTime walkthrough, or need help diagnosing an off-season issue, shoot me an email at efoils@mackite.com and we'll get you sorted.
Stay warm, stay stoked, and we’ll be back on the water before you know it.
Brazilian Brothers Review the 2026 Cabrinha Switchblade
Whether you're new to the kiteboarding scene or are an old-timer who learned on a C-kite, chances are you've heard of the Cabrinha Switchblade and perhaps have even owned one or two. The Brazilian Brothers have been putting an early release of the 2026 version through its paces and are ready to share their thoughts now that it's available to the public.
What is the Cabrinha Switchblade?
It's been two decades since Pat Goodman designed the first Switchblade for Cabrinha. It introduced massive depower and a huge wind range, making kiteboarding accessible to more riders. It has been updated ever since, making it one of the most sold kite models of all time. Even the Brothers learned to kitesurf on a Switchblade many years ago.
What's New with the Switchblade for 2026?
You'd think that there wouldn't be anything left to improve after 20 years, but kiteboarding is still a relatively young sport and isn't out of innovations yet. The first thing the Brothers noticed once they launched the 2026 Switchblade was how light the bar pressure had become. It felt much closer to the Nitro, a kite with one of the lightest bar pressures the Brothers have flown.
Also good was what hadn't changed. The Switchblade still has a wide wind range and is intuitive enough for a new kiter. Although the Brothers hadn't been on a Switchblade in a couple years, they felt comfortable on it right away.
How Does the Switchblade Jump?
While it's not a dedicated big air kite like the Nitro, don't let that keep you grounded. The Switchblade is a very capable jumper that allows anybody to hop on it and get some good airtime. The moderate aspect ratio gives the Switchblade more forward speed and lets you fly it across the wind window much faster than older models. This translates into better vertical lift, easy jumping, and soft landings.
Is the 2026 Switchblade Good for Looping?
The Brothers were impressed at how much looping has been improved since they last flew a Switchblade. Loops are tight and fast with a very nice catch. The light bar pressure also helps, making it easier and more comfortable to pull loops. And perhaps best of all- there's absolutely no fluttering and flapping; this kite is quiet!
Is the 2026 Switchblade Easy to Use?
Part of the reason the Switchblade has been so popular year after year is its reputation for being a kite that's accessible to riders of all levels, and it still shines there. Whether you're a beginner kiter looking to improve your jumps or an advanced rider tackling your first boogie loops, the Switchblade is awesome. It has a big wind range, easy relaunch, and a really good amount of depower.
Who Is the Switchblade For?
Anyone can hop onto the Switchblade and have a ton of fun. You can learn to kiteboard on it, but the Brothers were doing boogies on this kite almost immediately, so it is definitely not going to hold back your progression even if you are an advanced rider.
Would the Brothers Recommend the 2026 Switchblade?
Arthur and Rubens were pleasantly surprised with the 2026 Cabrinha Switchblade. It still had the characteristics they loved the last time they rode one, like the big sweet spot for jumping and the huge wind range. But it was the light bar pressure and improved speed that got them the most excited to get back on it. It's definitely a kite they can recommend to riders who like to do a bit of everything.
The Cabrinha Unify Control System represents the next evolution in kite control technology—a streamlined, high-performance bar that blends safety, comfort, and precision into one cohesive system. Designed for riders who demand both simplicity and innovation, the Unify marks Cabrinha’s most refined bar to date, setting a new standard for intuitive control and long-term reliability.
A Legacy of Innovation
For years, Cabrinha has been at the forefront of kiteboarding technology, continually refining the connection between riders and their kites. Following the success of the C.O.S. (Cabrinha Operating System), the Unify Control System introduces a new level of refinement and user confidence. Its design is lighter, more ergonomic, and engineered to meet the demands of modern kiteboarding—whether you’re boosting big airs, carving waves, or cruising in light wind.
Cabrinha’s tagline, “Confidence at your Fingertips,” sums it up perfectly. Every component, from the grip texture to the quick-release mechanism, has been engineered for seamless interaction between rider and kite.
Key Features
Click-In Quick Release System
The heart of the Unify is its click-in, quick-release, an industry-proven safety system trusted worldwide. It combines immediate release with effortless reassembly. Riders can re-engage the system simply by pushing the loop back into place, eliminating the need for fumbling or force.
Dual PU-Coated Tubes and Auto Unwind
A hallmark of Cabrinha’s design is its auto-unwind function, powered by dual PU-coated tubes and high-performance ceramic bearings. These components allow your lines to automatically untwist after rotations or loops, maintaining control line symmetry and reducing wear—perfect for riders who push their kite through spins and advanced maneuvers.
Lightweight Trimlite Cleat System
The Trimlite cleat, featuring a CLAMCLEAT® CL211 anodized cleat, offers micro-precise trimming for power adjustments. Lightweight yet strong, this system makes depowering your kite smooth and controlled even in gusty conditions.
Low-V Geometry with Optional Hi-V Setup
The Low-V connection provides a direct steering feel, enhancing response and stability. For riders who prefer a quicker, more pivotal turning kite, Cabrinha includes an optional Hi-V setup, allowing you to fine-tune your bar for your riding style.
Ergonomic Grip and Bar Design
Cabrinha has rethought bar comfort with a reduced-diameter EVA grip featuring pressed textures and an asymmetric design. This combination provides exceptional comfort, enhanced traction, and reduced hand fatigue during extended sessions. The injection-molded EVA bar ends add durability while remaining soft enough to minimize impact in crashes.
Technical Specifications
Bar Size
Recommended Kite Size
48 cm
5 m – 10 m
53 cm
10 m – 17 m
22 m lines + 2 m extensions for tuning line length to riding conditions
Stainless steel dual-chambered bar center for strength and longevity
Full ceramic bearings for frictionless performance in saltwater environments
Rider Impressions
Team rider Alberto Rondina sums up the Unify’s strengths:
“This is the most advanced, feature-rich control system I’ve used to date. I especially love the narrower diameter bar and grip, while it’s also lighter than the COS. The safety system is the most advanced and tested in the world—it’s the perfect tool to maximize kite performance.”
Designed for Every Style
The Unify Control System isn’t locked into one discipline. Its precision and adaptability make it ideal for:
Freeride and Big Air: Quick release and automatic unwind provide confidence during high-load maneuvers.
Surf and Foil: Lightweight design and smaller diameter grip enhance finesse and comfort during prolonged rides.
Progression: Simple setup and intuitive safety features help new riders grow into their skills safely.
The Details That Matter
Reliability: Built on a globally trusted release system, enhanced for Cabrinha’s 2026 lineup.
Streamlined: A modern evolution—lighter, simpler, and more compact.
Grip & Comfort: Reduced diameter bar for improved control and reduced fatigue.
Trim: Instant, precise power management on the fly.
Auto Unwind: Effortless line management via ceramic bearings.
Future Proof: Built for evolving kite performance and line setups.
Included Accessories
Each Unify Control System includes:
Short Leash
XS Freeride Loop
Tool Set and Repair Kit
Final Thoughts
The Cabrinha Unify Control System isn’t just another bar—it’s a thoughtful redesign of the most critical connection in kiteboarding. Its lightweight feel, ergonomic comfort, and mechanical precision create a new level of control that riders can trust session after session.
Whether you’re chasing performance, safety, or simplicity, the Unify represents Cabrinha’s vision for the future of kite control—a single, unified system built for the next generation of kiteboarders.
The Brazilian Brothers have been using the Cabrinha Nitro in their kite clinics since it was released in 2023, so they're very familiar with it. Now they've got a fresh 2026 Nitro. What's new, how does it stack up to past versions, and who is it for?
What is the Cabrinha Nitro?
The Nitro is a 5-strut big air kite developed by Pat Goodman, who also designed kites like the Switchblade and North Orbit. The Brothers love it for its ability to perform heli-loops and help students up their big air game with kiteloops.
What's New with the Nitro for 2026?
The 2026 kept all the features the Brothers loved, with one notable improvement. This year, the hangtime is much more consistent. In the past, the lift might be great, or it might not. The 2026 Nitro let them down--in a good way--with soft, easy landings from big jumps and loops.
How Does the Nitro Jump?
The 2026 Nitro is still and easy and accessible kite for riders of all levels to jump. It's got a big sweet spot to help you boost nice and high. Now, you'll need to get out in 25+ knots to get this. The Nitro remains a kite that likes to be ridden powered up and even overpowered, so don't expect to get much air on lighter days. An 8 or 9m in over 25 knots is going to take you to the moon, though.
Is the 2026 Nitro Good for Looping?
Some kites like the Orbit are great loopers, but require a lot of technique to perform. The Nitro, on the other hand, is an easy and intuitive kite to loop. It has very little yank and is fast through the loop. This gives people the confidence they need to throw their first kiteloops and progress through their kiteloop rotations, which is why the Nitro is the Brothers' pick for their clinics. Riders who have never looped before are suddenly looping like mad, which is an amazing transformation to watch.
Is the 2026 Nitro Easy to Use?
In a word- it's awesome. Now, it's not as easy as something like the Switchblade, but this is a kite for intermediate to advanced riders, and they're going to have no problem jumping on and feeling comfortable. The bar pressure is light but direct, and the more accessible and consistent lift for this year is going to let anyone improve their big air game.
Who Is the Nitro For?
As mentioned, this isn't a kite for beginners. It's also not a strapless or foil kite. This is a kite for riders who can ride lit and are ready to boost with a twintip on (or off) their feet. It is a 5-strut big air machine.
Any Tips for Riding the 2026 Cabrinha Nitro?
The Brothers always ride the Nitro on the "A" setting. It keeps the bar pressure extremely light and the kite pivotal.
Pat Goodman also suggested that they try riding it with a High-V bar, and they were pleasantly surprised. It made the kite even faster through the loop with just about the lightest bar pressure they've experienced. Give those settings a try and see what you think!
Would the Brothers Recommend the 2026 Nitro?
Rubens and Arthur are as stoked on the new Nitro as they have been on past versions, if not more with the improved lift and second lift the kite gives. Their two favorite sizes are the 7m and 8m. The light bar pressure, ease of looping, and the ability to ride overpowered combine to make a kite that's going to get you looping with no problem.
Professional wakeboarders, wakesurfers, and wakefoilers are taking their craft to a new frontier, powered by Foil Drive. In this latest adventure, professional wakeboarder and Foil Drive ambassador Gunther Oka joined friends on a mission to explore how the Foil Drive could transform lake sessions into something completely new. Their plan? Load up the gear, take the boat out, but use it as little as possible. The real goal was to pirate some waves, using the Foil Drive to chase, catch, and ride wakes across the lake.
Freedom to Roam | The Foil Drive Advantage
The day began with a simple but liberating realization: the Foil Drive’s lightweight design makes it easier than ever to travel, launch, and explore. Gunther noted how he could carry the unit with one hand, which is a sharp contrast to heavier eFoil setups. Once on the water, it was all about harnessing the Foil Drive’s power to surf wakes from any boat, without relying on a dedicated driver or a full crew.
By combining traditional foiling skills with Foil Drive assist, the riders discovered they could roam freely from one boat’s wake to another, effectively unlocking a whole new dimension of lake riding. No need to wait for the rope or the perfect setup. Just throttle up, foil out, and drop into the next wave.
Throttle, Glide, Repeat
Once they got riding, the pros quickly learned that the Foil Drive offered something unique: instant recovery and unlimited creativity. When riders found themselves too high on the foil or in danger of losing the wave, a quick tap of throttle brought them right back into the pocket. Instead of pumping furiously to stay on the face, they could flow, using the electric assist to maintain momentum and link turns that would’ve been impossible on a standard setup.
Gunther explained that it didn’t feel like a heavy eFoil or compromise performance. He was able to ride his normal wake setup and even switch between smaller and larger foils depending on the mood. Smaller for sharper, faster turns, and larger when he wanted to hang back and carve further down the line. The Foil Drive’s minimal drag and smart weight balance kept the ride natural, smooth, and responsive.
Turning Every Lake into an Endless Playground
One of the highlights came when the crew realized how effectively the Foil Drive let them utilize all the rollers a wakeboat produces. Normally, wakesurfers and foilers can only ride the primary wave directly behind the boat. But with electric assist, they could surf the second, third, even fourth rollers, or jump from one to another, with ease. It became less about following the boat and more about exploring the entire lake as an open playground of energy and flow.
Gunther shared how he could drop in, chase a few waves, then peel off toward another passing boat without missing a beat. Even better, he could do it solo—no driver, no rope, no problem. For riders who live near smaller lakes or don’t always have a crew, the Foil Drive opens the door to spontaneous sessions anytime conditions line up.
Respecting the Lineup and Sharing the Stoke
Even with the new freedom, the crew kept it friendly. Gunther emphasized the importance of respecting others on the water, giving wakesurfers space and maintaining good vibes while exploring new waves. With everyone enjoying the lake, the Foil Drive crew found that most boaters were stoked to share their wakes once they saw how gracefully the foilers moved around.
Their day ended at a lively sandbar with boats everywhere, music in the background, and more than enough rollers to keep the fun going. Between relaxed hangs and spontaneous foil sessions, it was clear that this wasn’t just a new way to ride, it was a full-on lifestyle shift. The Foil Drive wasn’t just an accessory—it was a key to freedom, creativity, and connection on the water.
Redefining What’s Possible Behind the Wake
Across the sessions, one message stood out: the Foil Drive is reshaping wake sports. It bridges the gap between eFoiling, wakesurfing, and traditional wake foiling. This empowers riders to ride longer, explore farther, and make the most of any conditions. Whether it’s cruising solo on a quiet morning or hopping wakes at a crowded lake party, the possibilities are expanding fast.
As Gunther and the crew wrapped up their day, they left with grins, tired legs, and a new perspective on what’s possible with the right tool. “We really expanded our horizons,” Gunther said, reflecting on the sessions. “These toys just keep pushing how far we can shred.”
Key Takeaways
Freedom without a tow – Foil Drive lets riders catch and ride wakes without needing a driver or a rope.
Instant recovery – A burst of throttle keeps riders in the wave when they’d otherwise fall off.
Same setup, more versatility – Works with your normal foil gear, without feeling like an eFoil.
Ride multiple wakes – Surf multiple rollers and hop between boat wakes across the lake.
Compact and travel-friendly – Lightweight, easy to carry, and simple to mount.
For decades, wearing a helmet in the surf or on the water carried a certain stigma. It looked awkward, felt bulky, and often interfered with the natural flow of riding waves. But the level of performance and risk in modern water sports has evolved—along with the understanding that protecting your head just makes sense. Recognizing this shift, Mystic set out to design a helmet that riders would actually want to wear. The result: the Legacy Helmet, a breakthrough in comfort, function, and design for surfers, foilers, and watermen everywhere.
Designed from the Water Up
Unlike helmets repurposed from biking or snowboarding, the Legacy was built from scratch for water. Mystic’s design team—made up of kiteboarders, wakeboarders, foilers, and surfers, knew that performance in the ocean demanded a new approach. As Senior Technical Designer Yos Hazmons explains, “We wanted to make a helmet that worked for every person in the same way, without compromise.”
Mystic’s goal was simple but revolutionary: make a helmet that feels like a surf hood. That single idea guided every design decision, from profile shape to water flow. The result is a low-profile, close-fitting lid that looks and feels familiar, allowing riders to move naturally without the awkward tugging or drag typical of older helmet designs.
The Fit | Personalized and Streamlined
The foundation of the Legacy Helmet is its adaptive fit system. By studying extensive cranial data, Mystic identified that the greatest variance in human head shape occurs around the cranium—the back of the head. The solution was an adjustable rear design that flexes to conform to each rider’s unique shape. This not only improves comfort but also enhances hydrodynamics, allowing water to flow seamlessly around the helmet rather than catching and pulling it backward.
Engineered for Water Flow and Comfort
Duck diving and high-speed falls are key testing points for any surf helmet. Traditional designs tend to lift or shift under pressure. The Legacy’s slim fit shell stays locked in place, thanks to precision contouring and internal flow channels.
Air and water move through twin front inlets and a network of channels that guide flow to the sides and rear. A sharply angled brim releases water away from the rider’s eyes during resurfacing, solving one of the most frustrating design flaws of older helmets.
To further refine the feel, Mystic added a fine mesh layer to reduce whistling caused by airflow through the vents—an attention to detail that reflects the brand’s surf-driven engineering philosophy.
Safety Without Sacrifice
At its core, the Legacy Helmet is still about protection, but Mystic understood that a water helmet requires a delicate balance between safety and flexibility. Too stiff, and it feels restrictive. Too soft, and it can’t dissipate impact energy.
To achieve the right combination, Mystic paired a hard outer shell for sharp-impact resistance with a dual-density EVA foam interior that cushions against softer hits. After extensive testing, the Legacy achieved the same CE safety certification as Mystic’s wakeboard helmets, meeting strict standards for impact protection while maintaining exceptional comfort and mobility.
The Details that Matter
Every feature of the Legacy was tuned for real-world performance:
Universal fit system: adjustable rear strap ensures a secure fit for all head sizes.
Hydrodynamic air and water channels: maintain balance between protection and flow.
Anti-drip brim: prevents water from streaming into the eyes after duck dives.
Integrated ear protection: reduces wind noise and prevents whistling at speed.
Chin strap: keeps the helmet secure through wipeouts and heavy surf.
The result is a helmet that performs seamlessly across disciplines—from surf foiling and kiteboarding to wake and downwind foiling.
A New Standard for Confidence
More than just a piece of safety gear, the Mystic Legacy Helmet represents a shift in mindset. It redefines what a surf helmet can be: not a compromise, but a companion.
When the waves are heavy or the foil’s flying fast, riders can move freely with trust in their equipment. The Legacy doesn’t just protect—it empowers. It’s a helmet that feels like a hood and performs like armor, letting riders push limits without distraction.
North Boost | The Next Evolution in Foil Drive Boards
North has once again redefined the standard of innovation in the world of foiling. The North Boost Foil Drive Board is engineered from the ground up for electric-assisted foiling across flat water, surf, and open-ocean conditions. Designed to combine effortless speed, enhanced ride control, and intelligent efficiency, the Boost represents a new frontier for riders seeking to explore more waves, more often, in more places.
Designed for Electric Assist Foiling
At its core, the Boost was created to maximize the potential of Foil Drive technology. Unlike traditional foil boards adapted for e-assist systems, this board was specifically built to integrate seamlessly with the Foil Drive unit, resulting in minimal drag, optimal stability, and superior control.
Mike Draper, Chief Brand Officer at North, describes the Boost as “one of the most efficient ways to foil.” Its high wave count and adaptable design allow riders to chase anything from glassy inland waters to rolling ocean swells — opening up a new level of freedom for the electric foiler.
Intelligent Construction | Lightweight, Strong, and Streamlined
The Boost features an E-glass optimized layup combined with a full PVC wrap, striking the perfect balance between lightweight handling and long-term durability. Every aspect of its construction was designed for efficiency and longevity:
E-glass optimized layup enhances stiffness and energy transfer.
The full PVC wrap protects against impact and water intrusion.
Lightweight design keeps lift and control intuitive, even during longer rides.
This makes the Boost both robust and remarkably responsive, giving riders the confidence to push performance boundaries without compromise.
Shape and Design | Built for Lift, Speed, and Control
The board’s long and narrow profile is key to its efficient takeoff and glide. This design allows for fast lift to foil while maintaining enough buoyancy for easy starts, crucial for riders who rely on the electric assist for smooth takeoffs.
Additional design highlights include:
V-shaped forward hull for clean water release and reduced drag.
Beveled rails for forgiving touchdowns and smoother transitions.
Balanced volume distribution that minimizes stance changes between foil and displacement modes.
Pulled-in nose and tail for agile wave riding and better fit on steeper faces.
Together, these elements create a board that feels stable underfoot but lively when carving or pumping — an ideal balance for electric-assisted performance.
The Recessed “Super Trench” | Efficiency by Design
One of the most defining features of the North Boost is its recessed Super Trench with dropbox mounting track, integrated into the 4'9" and 5'3" models. This clever engineering move sets the Boost apart from other foil drive boards by:
Lowering drag through the recessed motor placement.
Allowing water to flow freely beneath the hull improves glide and runtime efficiency.
Reducing energy consumption, giving riders longer battery life per session.
Additionally, the trench places the battery weight closer to the rider’s feet, enhancing balance, carving precision, and pumping efficiency. The generous trench dimensions even allow quick battery swaps without removing the entire drive unit — a major convenience for riders maximizing their time on the water.
Options for Every Rider | Trench and Non-Trench Models
North understands that not every rider needs the same level of performance integration. For those who prioritize maximum stability and ease of use, the Boost is also available in non-trench versions. These boards offer:
A larger, more forgiving platform perfect for flat-water cruising.
An ideal setup for learning powered foiling.
This makes the Boost accessible to newcomers while still offering the advanced functionality seasoned riders demand.
Ride Anywhere, Anytime
The North Boost isn’t just a board — it’s a platform for freedom. Whether you’re cruising calm lakes, exploring downwind runs, or catching endless surf lines with minimal effort, the Boost is designed to make every condition rideable.
By pairing thoughtful engineering with North’s proven craftsmanship, this board opens up a new dimension of accessibility for the Foil Drive community. Earlier lift, longer rides, and sharper carving come together in a single, purpose-built design that turns every session into a high-efficiency adventure.
Key Takeaways
Purpose-built for Foil Drive integration — not a retrofitted design.
E-glass layup and full PVC wrap make it lightweight yet durable.
V-hull and beveled rails ensure a forgiving and efficient handling experience.
The recessed Super Trench enhances hydrodynamics and improves battery efficiency.
Battery placement near the foot position enhances control and carving.
Available in trench and non-trench options to suit different rider levels.
Final Thoughts
The North Boost Foil Drive Board represents the next evolution in electric-assisted foiling. It combines the speed, stability, and precision that riders demand with the intelligent engineering and durability for which North is known.
Whether you’re carving through ocean swells, chasing endless flat-water runs, or exploring new coastlines, the Boost delivers the power to ride anything, anywhere, anytime — with unmistakable North performance.
Brazilian Brothers Review the Ride Engine Empax V2 Vest
You've heard that you "should" wear an impact vest, but do you really need one? And if so, what's a good one that won't get in your way? The Brazilian Brothers think they have the answer to both questions in the Ride Engine Empax V2.
What's an Impact Vest For?
Protection
Buoyancy
Warmth
Harness Positioning
An impact vest has a few benefits, not just the obvious protection from impact. You get some buoyancy, which is very helpful when you're in the water trying to relaunch your kite. You can focus on getting the kite back in the air rather than using up all your energy treading water.
An impact vest also provides a little warmth for your core. Long sessions can get a little chilly, especially when you're pushing yourself to learn something new and get dunked a lot, and the vest will make that a bit more comfortable.
If you wear a waist harness, you know the struggle of keeping it from riding up. An impact vest does a lot to help keep your harness in place so you're spending more time riding and less time adjusting your harness.
And the protection these vests offer cannot be overstated. It can take weeks and even months for a rib injury to heal enough to ride without pain, and these vests are designed to absorb the impact from your falls that your ribs would normally take.
Whether you're going for your first backrolls or attempting a double kiteloop, an impact vest is easy insurance against season-ending injuries.
Is the Ride Engine Empax V2 a Good Vest?
Sleek & Stealthy
Comfortable
Protective
Warm
Easy to Use
The Brothers have been using the Empax for a couple months now, and they are loving it. They admit that they had been avoiding wearing a vest because they didn't want to be labeled as kooks, but some painful landings had them reevaluate their priorities.
The slim profile of the Empax is not only comfortable, it's subtle. Thow a rashguard on over the top and most people won't even notice you're wearing a vest.
That slick, low profile doesn't compromise on protection. Padded panels are strategically placed in the areas where injuries tend to occur, including those painful rib pops. When you get thrown into an unintended rotation and land on your rib, this vest is going to absorb the brunt of that impact.
The limestone neoprene in this vest is very comfortable, feels good on the skin, and adds just a bit of warmth. The padding is all higher up, with the waist section nice and thin so that your harness fits properly.
A front zipper lets you get in and out of your vest in just a second, and the zipper does a nice job of staying up the whole session. Like any zipper, it can get pushed down by a hard crash, so just give it a quick check after you surface and you'll be good to go.
Would the Brazilian Brothers Recommend the Empax V2?
Having worn this vest for a couple months, they can't imagine going out without it now. It's slick and comfortable and has padding in all the right places. It has already saved their ribs more than once. It adds just enough warmth and flotation and is easy to get on and off. Thanks to the Empax, the Brothers are now big advocates of wearing an impact vest no matter your skill level.
Parawinging is rapidly emerging as the next big evolution in foiling sports. From the downwind runs of Hawaii to the iconic conditions of Hood River, more riders are discovering how this self-powered discipline unlocks the thrill of foiling without relying on perfect downwind conditions or shuttle logistics. In this comprehensive breakdown from Code Foils, we’ll walk through what parawinging is, why it’s taking off, and the ideal setup to get started—including wing size, foil choice, board selection, and key technique tips for early success.
What Is Parawinging?
At its core, parawinging combines elements of downwind SUP foiling and wing foiling, allowing riders to “self-position” and generate their own lift using a handheld parawing. The idea came from riders who loved the feeling of downwind glides but didn’t always have time—or conditions—to commit to a multi-hour shuttle run.
By using a parawing, riders can launch from almost anywhere, control their positioning on the water, and still capture the flowing, surf-like freedom of downwind foiling. It’s a natural progression for experienced foilers looking for independence, versatility, and that same endorphin rush—without the logistical hurdles.
Choosing the Right Parawing
When choosing your first parawing, simplicity and balance are key. The latest generation of wings from most major brands all perform well, offering smooth depower and consistent pull.
Ideal Parawing Size:
Around 4 meters is the sweet spot.
Larger wings generate more power but become cumbersome to manage.
Smaller wings require higher wind speeds and can make early learning more difficult.
A 4m wing strikes the perfect balance between power, handling, and portability.
The goal is easy water starts, stable flight, and predictable power delivery—all of which help shorten the learning curve.
Selecting Your Foil Setup
Just like with SUP or wing foiling, foil selection is crucial for stability and control. Code Foils’ lineup offers an excellent starting point:
Foil:
The S Series is ideal for parawinging.
It’s forgiving yet responsive, offering great glide and smooth turns.
A 1300 cm² front wing is a versatile size for light wind and early sessions.
Mast:
Around 80 cm is optimal.
Shorter masts (around 75 cm) can cause tip breaches when going upwind.
Longer masts (85+ cm) become inefficient and harder to control.
The 80 cm mark hits the perfect balance for stability and performance.
Fuselage:
Start with a medium-length fuse for added stability and leverage when pumping out of the water.
Stabilizer:
Pair the S-Series with an AR150 for a stable, controlled feel. Once confident, switch to the 120R for more speed and maneuverability.
This setup provides enough lift to learn efficiently while keeping handling responsive for turning and carving downwind.
The Ideal Board
Board choice plays a massive role in early success. While many downwinders can double as parawing boards, a mid-length shape provides better balance and maneuverability.
Ideal Specs: Around 70 liters in volume and 20 inches wide.
Avoid going too long or too skinny at first—excess length can make balance tricky, and narrow boards tend to feel unstable in crosswinds.
A board like the Code Scyther is an excellent example—lightweight, stable, and forgiving for early takeoffs.
Remember: your board should float your body weight comfortably. Skip the sinker board until you’re fully confident.
Mastering Wing Control
Before hitting the water, spend time on the beach. Getting familiar with your wing’s feel, steering, and power management will dramatically reduce your learning curve.
Here are some progressions to learn on land:
Practice launching and depowering.
Understand the difference between sheeting in (powering) and sheeting out (depowering).
Turning comes from subtle wrist rotation.
Keep slight tension in the lines—if you’re fully depowered, the wing won’t steer.
Keep the wing above your head (“zenith” position) when organizing gear or preparing to water start.
For takeoff, bring the wing down to a 45° angle (around 11:00 or 1:00 position). Too high and you’ll lose pull; too low and it’ll touch the water.
Launching and Stowing the Wing
Launching technique can make or break your first sessions. Avoid simply tossing the wing or trying to launch it on the water.
To Launch:
Hold the leading edge in a “10 and 2 o’clock” grip with two fingers. Wait for a gust, then release smoothly—it will naturally lift and catch air.
To Stow:
Grab all the front lines, work toward the leading edge, and gather the canopy cloth. Once contained, roll it concertina-style (accordion fold). Secure the lines and bar next to the wing for a clean, tangle-free packdown.
Ideal Conditions for Learning
Your first few sessions should prioritize calm, controlled environments.
Wind:
15–20 knots is perfect.
Below 15 knots, it’s tough to generate lift.
Above 20 knots, the sea state becomes messy, and handling becomes difficult.
Water:
Flat water, like a lake or sheltered bay, is best for progression.
Safety:
Always use a stash belt to carry your wing until you’re in position offshore. It frees your hands and prevents accidental inflation near the shore.
Avoid breaking surf or open-ocean downwinds until you’ve logged multiple flatwater sessions and can comfortably control power, direction, and wing handling.
Key Takeaways
Wing: Modern 4m wing for ideal power-to-control balance.
Board: Mid-length (around 70L), slightly over body weight in volume.
Foil: Code Foils S-Series 1300, 80 cm mast, medium fuselage, AR150 or 120R stabilizer.
Conditions: 15–20 knots of steady wind and flat water.
Practice: Spend several hours on land before entering the water.
Final Thoughts
Parawinging delivers the joy of foiling anywhere, anytime, without the constraints of tides, shuttles, or group coordination. With the right setup and a few sessions under your belt, you’ll discover an entirely new way to chase that downwind flow.
The combination of Code Foils’ forgiving S-Series wings, a balanced 4m parawing, and a mid-length board creates a setup that’s not only beginner-friendly but endlessly rewarding as your skills grow.
As this sport continues to explode across the globe, from Hood River to Sydney, there’s never been a better time to join the movement.
Brazilian Brothers Try Big Air on the Harlem Thrive
We've been seeing some exceptional kites coming from brands collaborating with Brainchild, so the Harlem Thrive has got the Brazilian Brothers excited to do a review on it. It excels at freeride, wave and the Brothers' favorite, big air, so they took it out to test its jumping and looping ability, as well as to figure out just who this kite is right for.
What Is the Thrive?
Like other kites made in Brainchild's facilities, the Thrive takes advantage of Proweld technology, which ultrasonically fuses the leading edge panels. This uses less stitching and allows for a reduced leading edge diameter, resulting in a much lighter kite. Brainchild's digital printing also uses less dye, further reducing weight and opening up infinite options for graphics.
The Thrive also has very light bar pressure, no matter how much wind you've got. That's good news for your elbows, and you won't feel as intimidated when learning new tricks. You'll have longer, more productive sessions, meaning you'll progress faster. Even in overpowered conditions, the Thrive remains light and lively.
The Thrive's depower is incredible. When you sheet out, you'll immediately lose power, giving you a lot of control. In overpowered conditions, you can dump power and get a nice edge for a vertical takeoff.
How Is the Thrive for Looping?
The Thrive absolutely shines when it comes to speed. The 6m size is the kite of choice for Lorenzo Casati thanks to its incredibly fast loops. It's the fastest kite the Brazilian Brothers have tried, and yes, you can double loop it.
The Brothers had the 8m and it was a looping machine. In fact, it looped so well that they could even see heavier riders looping with a 10m.
The loops are fast and reliable. You can feel confident that this kite will catch you. And if you crank the bar, the kite has virtually no pull since it's so fast.
If you don't crank the bar all the way and sheet out a bit during the loop, you'll get a nice, explosive loop out of the kite, which can be really fun if you know how to handle that power.
How Does the Thrive Jump?
The Thrive will reward good jumping technique with an explosive vertical lift. However, finding the sweet spot can be challenging due to the kite's speed, so intermediate riders may struggle to achieve the full jumping potential of the kite. But when the stars align when it comes to your pop, you're going to get a really good boost.
Who Is the Thrive For?
This is a high-performance kite. Its speed makes it a great choice for kiteloops, but it does increase the technical level, and the average rider may struggle with that. It's going to be harder to find the sweet spot on jumps, and it's not very forgiving when it comes to steering. If you're doing a backroll and you pull the bar a bit too much in one direction, the kite will react and you won't be able to get dialed in on your rotations, especially on the smaller sizes.
If you're an advanced rider, you're going to love this kite. It's got light bar pressure, fast steering, and a ton of depower for those high-end conditions.
The Brothers are stoked on the Harlem Thrive and all the innovation that Brainchild is bringing to the kiting world. If you haven't tried it, they highly recommend that you give it a shot because it is unlike anything you've flown before.